SOLIDWORKS超入門:[参照ジオメトリ]コマンドで平面を作成してみました!
スケッチを作図したい平面がデフォルト平面(正面・平面・右側面)や3Dモデル上の平面から選べない場所にあるとき、メカニカル 3D CAD SOLIDWORKSでは[参照ジオメトリ]の[平面]コマンドを使うと、新しい平面を作成できます。
例えば、スイープやリブを作成するときに、スケッチを描く平面を新たに作る場合などに使えます。
今回は3Dモデルの底面からオフセットした新しい平面を作成してみました。
[参照ジオメトリ]コマンドを実行!
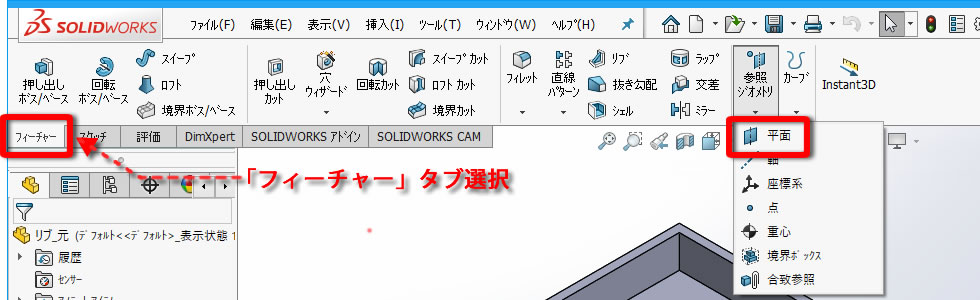
リボンメニューの[フィーチャー]タブにある[参照ジオメトリ]の「▼」を展開して、[平面]コマンドを選択しました。
参照する面を指定!
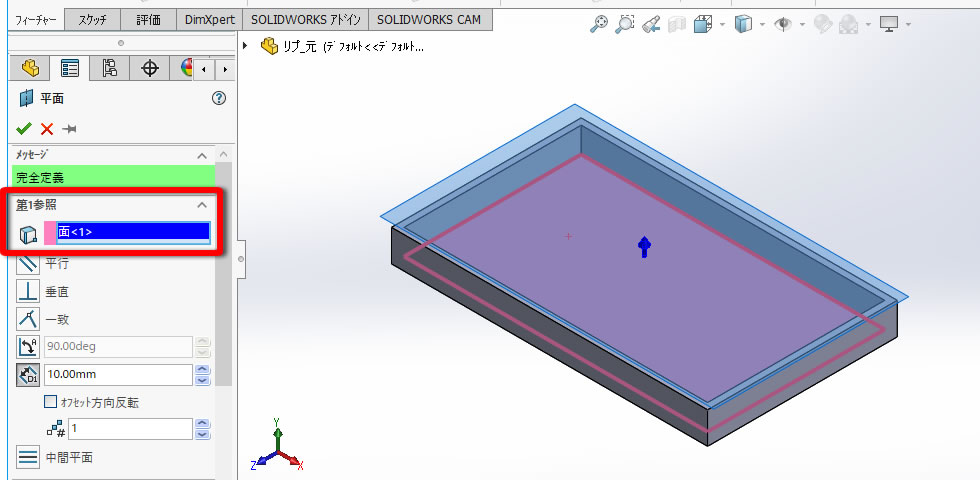
今回は底面から上側に5mmのところに面を作るので、画面左側にあるパラメータの「第1参照」で底面を指定しました。
距離を入力!
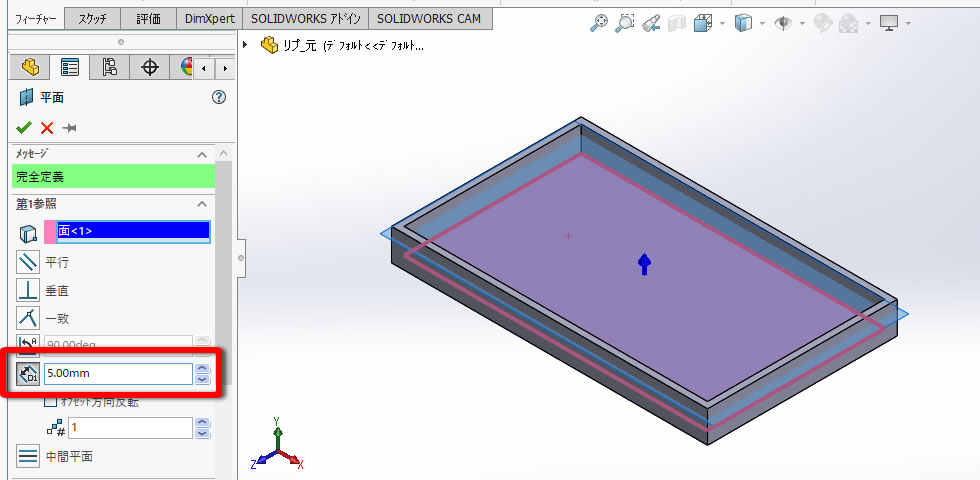
オフセット距離に「5」を入力しました。
面を完成させる!
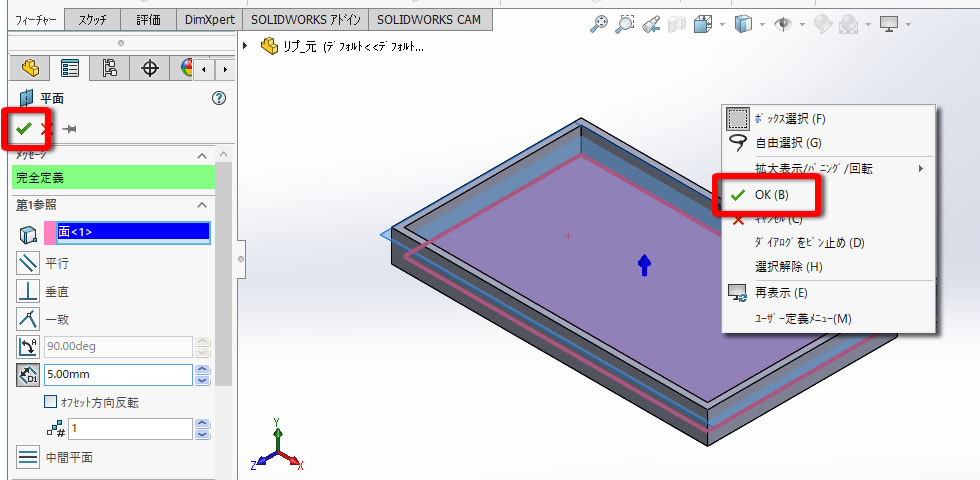

[OK]で面を完成させます。
[OK]入力の方法は、いくつか用意されています。
- プロパティマネージャ上部にある[ レ ] アイコンをクリックする。
- マウス右クリックで表示されるメニューから[OK]をクリックする。
- 「Enter」キーで[OK]する。
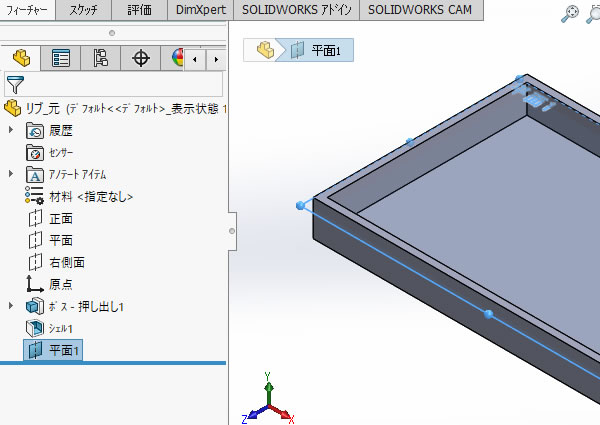
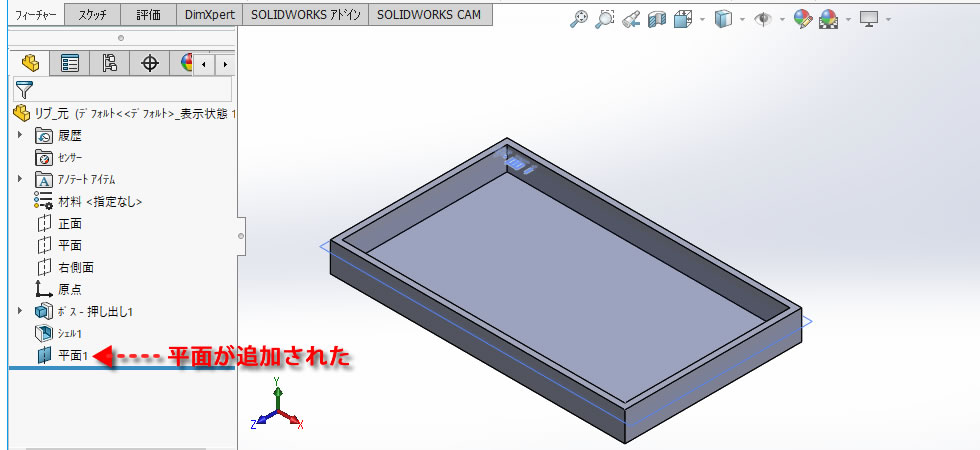
底面から5㎜上側に面ができました。
デザインツリーに「平面1」が追加されているのが確認できます。
参考記事
Warning: file_get_contents(): https:// wrapper is disabled in the server configuration by allow_url_fopen=0 in /home/ccube/cadcam.ne.jp/public_html/cad100blog/wp-content/themes/cad100blog-2024/functions.php on line 1040
Warning: file_get_contents(https://www.youtube.com/watch?v=6YYDB1Nnvtk): Failed to open stream: no suitable wrapper could be found in /home/ccube/cadcam.ne.jp/public_html/cad100blog/wp-content/themes/cad100blog-2024/functions.php on line 1040

Warning: file_get_contents(): https:// wrapper is disabled in the server configuration by allow_url_fopen=0 in /home/ccube/cadcam.ne.jp/public_html/cad100blog/wp-content/themes/cad100blog-2024/functions.php on line 1040
Warning: file_get_contents(https://www.cad100.jp/demo/demo-sw_movie.php): Failed to open stream: no suitable wrapper could be found in /home/ccube/cadcam.ne.jp/public_html/cad100blog/wp-content/themes/cad100blog-2024/functions.php on line 1040