IJCAD超入門:IJCADでトリムしてみました!
IJCADの[トリム(TRIM)]コマンドを使うと、基準のオブジェクトを指定してオブジェクトを切り取ることができます。はみ出た部分を簡単に切り取ることができるIJCADではよく使うコマンドの1つです。
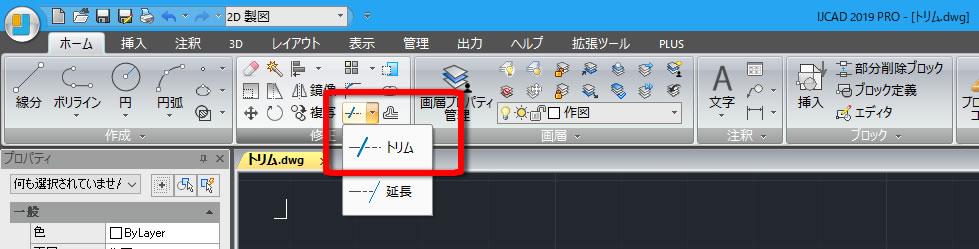
1、[トリム]コマンドを実行!
リボンメニューの[ホーム]タブの[修正]パネルにある[トリム]コマンドを選択しました。[延長]コマンドが表示されている場合はコマンドの横にある「▼」をクリックすると[トリム]コマンドが表示されました。
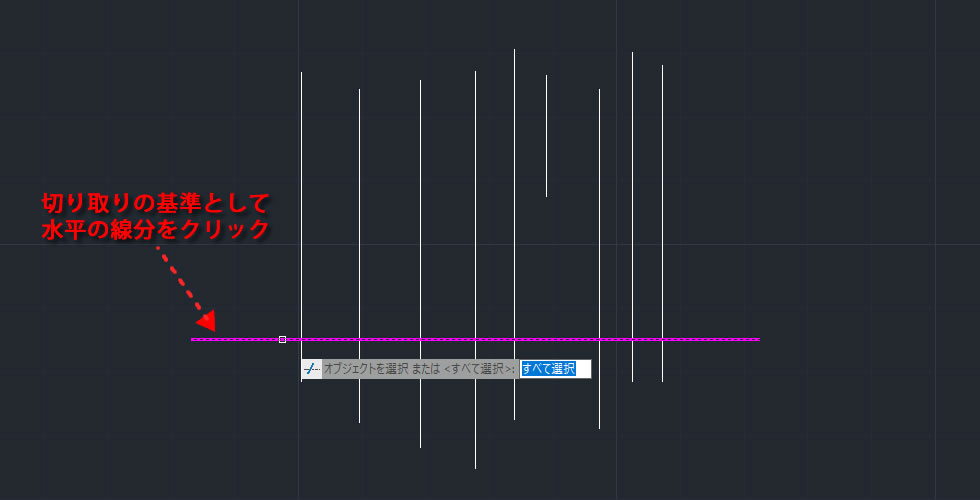
2、切り取りの基準にするオブジェクトを選択!
水平の線分を切り取りの基準としてクリックして、キーボードのエンターキーを押しました。
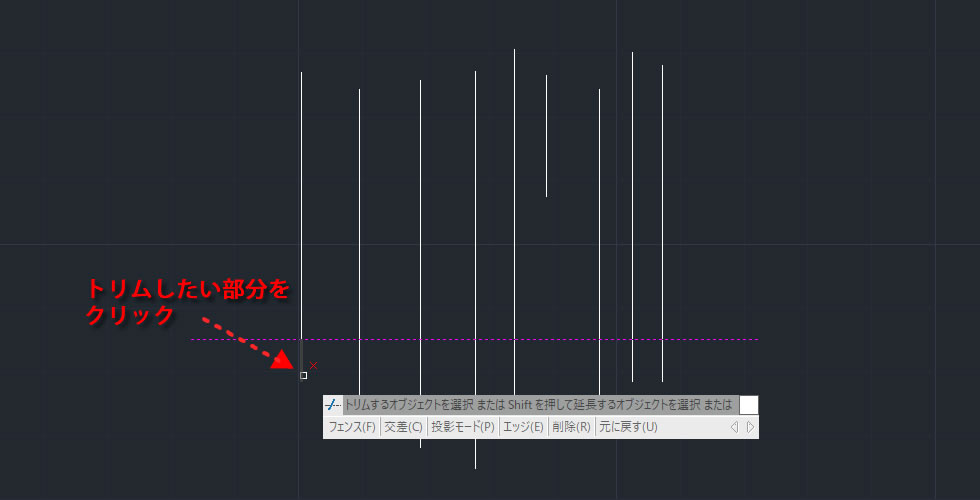
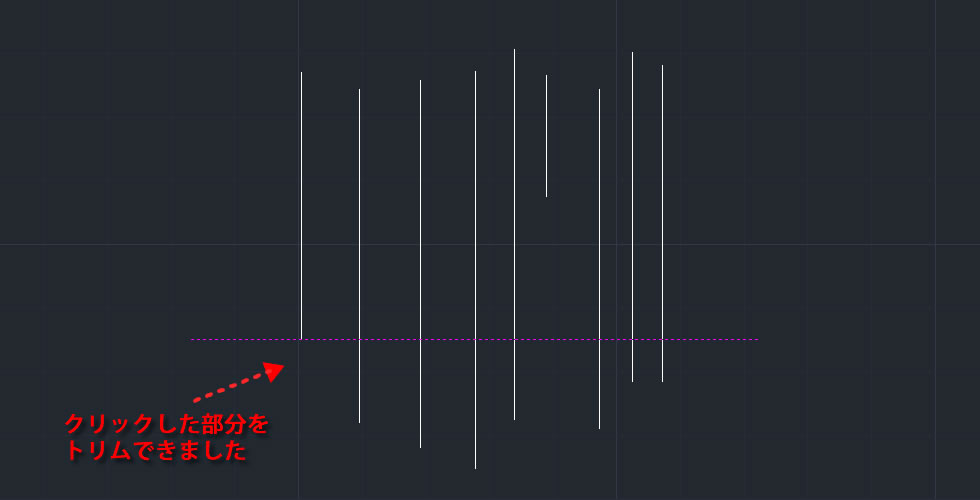
3、トリムしたいオブジェクトをクリック!
切り取りたい部分をクリックしました。
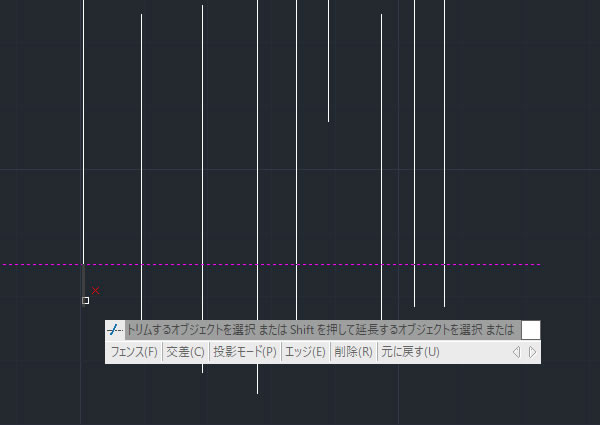
4、トリムができた!
クリックした部分をトリムできました。
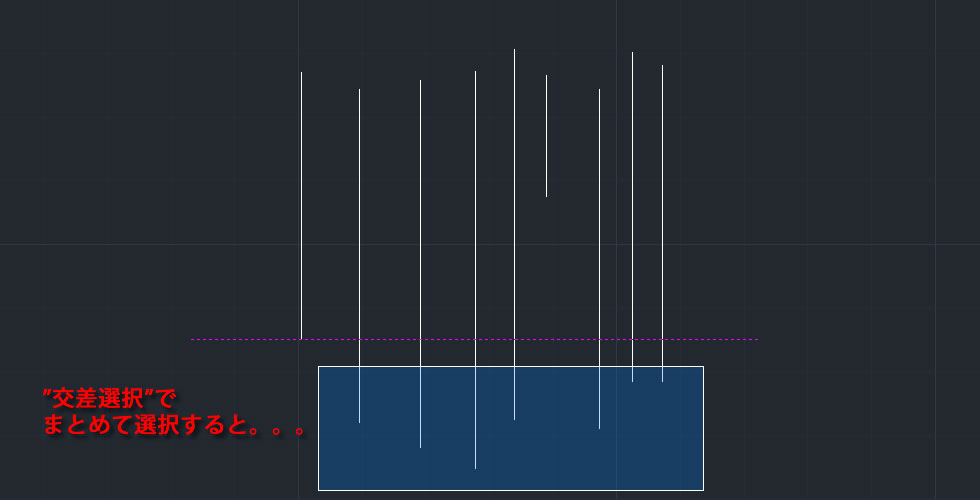
5、続けて交差選択でトリムしたいオブジェクトを選択!
交差選択でトリムしたい部分をまとめて選択しました
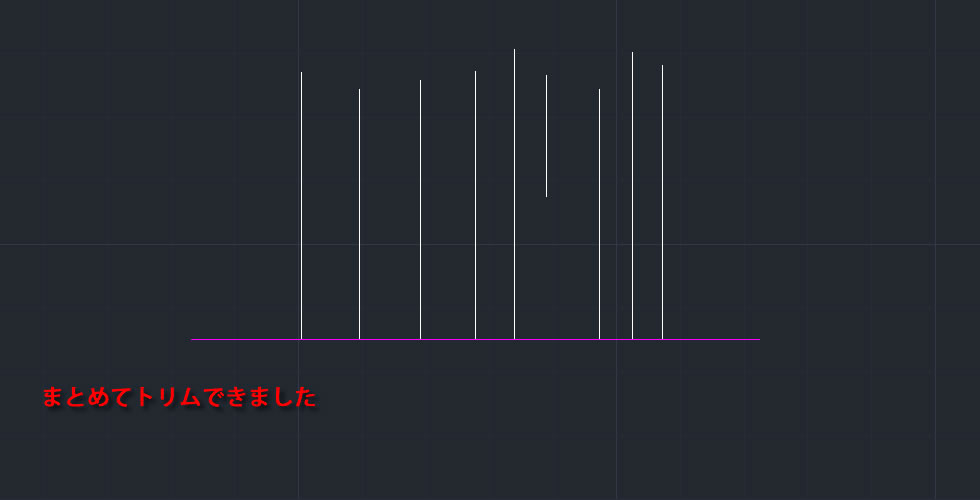
6、まとめてトリムができた!
交差選択で選択した部分をまとめてトリムできました。
【動画で見てみましょう】
参考記事
Warning: file_get_contents(): https:// wrapper is disabled in the server configuration by allow_url_fopen=0 in /home/ccube/cadcam.ne.jp/public_html/cad100blog/wp-content/themes/cad100blog-2024/functions.php on line 1040
Warning: file_get_contents(https://www.cad100.jp/goods/syohin_422.php): Failed to open stream: no suitable wrapper could be found in /home/ccube/cadcam.ne.jp/public_html/cad100blog/wp-content/themes/cad100blog-2024/functions.php on line 1040

Warning: file_get_contents(): https:// wrapper is disabled in the server configuration by allow_url_fopen=0 in /home/ccube/cadcam.ne.jp/public_html/cad100blog/wp-content/themes/cad100blog-2024/functions.php on line 1040
Warning: file_get_contents(https://youtu.be/tdK56xrm1vg): Failed to open stream: no suitable wrapper could be found in /home/ccube/cadcam.ne.jp/public_html/cad100blog/wp-content/themes/cad100blog-2024/functions.php on line 1040

Warning: file_get_contents(): https:// wrapper is disabled in the server configuration by allow_url_fopen=0 in /home/ccube/cadcam.ne.jp/public_html/cad100blog/wp-content/themes/cad100blog-2024/functions.php on line 1040
Warning: file_get_contents(https://www.cad100.jp/ijcad/): Failed to open stream: no suitable wrapper could be found in /home/ccube/cadcam.ne.jp/public_html/cad100blog/wp-content/themes/cad100blog-2024/functions.php on line 1040