SOLIDWORKS超入門:「ミラー 」コマンドでモデルを複写してみました!
左右対称のモデル形状を作成したいときに、メカニカル 3D CAD「SOLIDWORKS」の機能[ミラー]コマンドを使ったら簡単に作ることができました。
[ミラー]コマンドは平面を中心に対称複写するコマンドで、複写の元となる部分を編集すると複写した部分も連動して編集される便利なコマンドです。
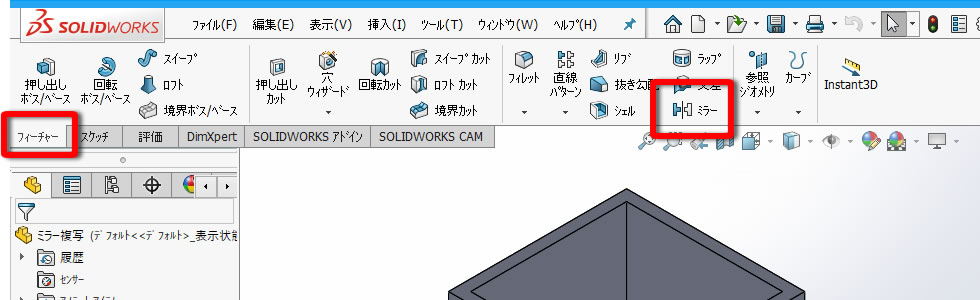
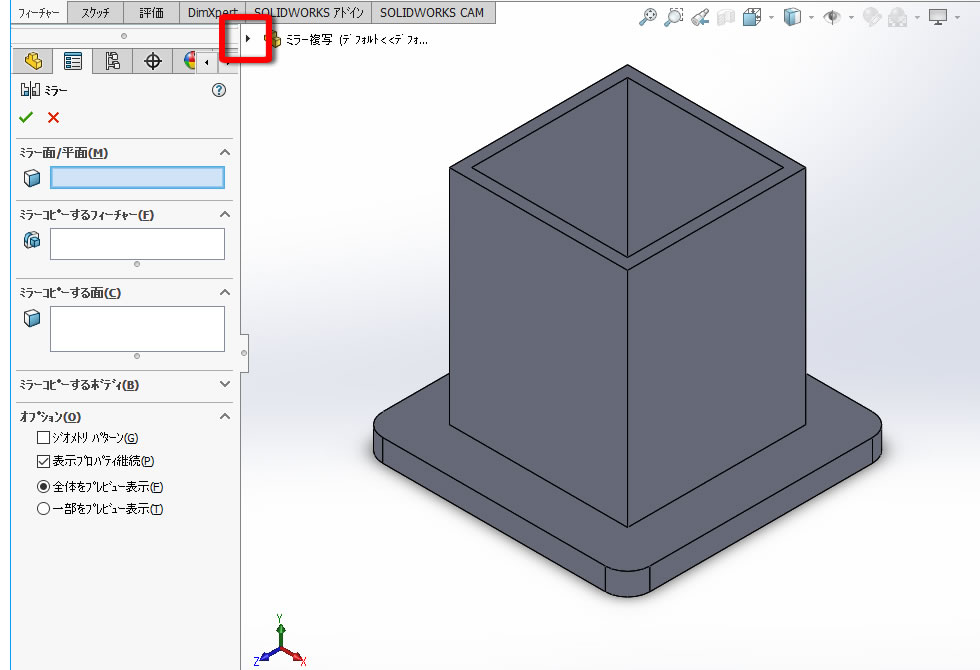
1、[ミラー]コマンドを実行!
リボンメニューの[フィーチャー]タブにある[ミラー]コマンドを選択しました。
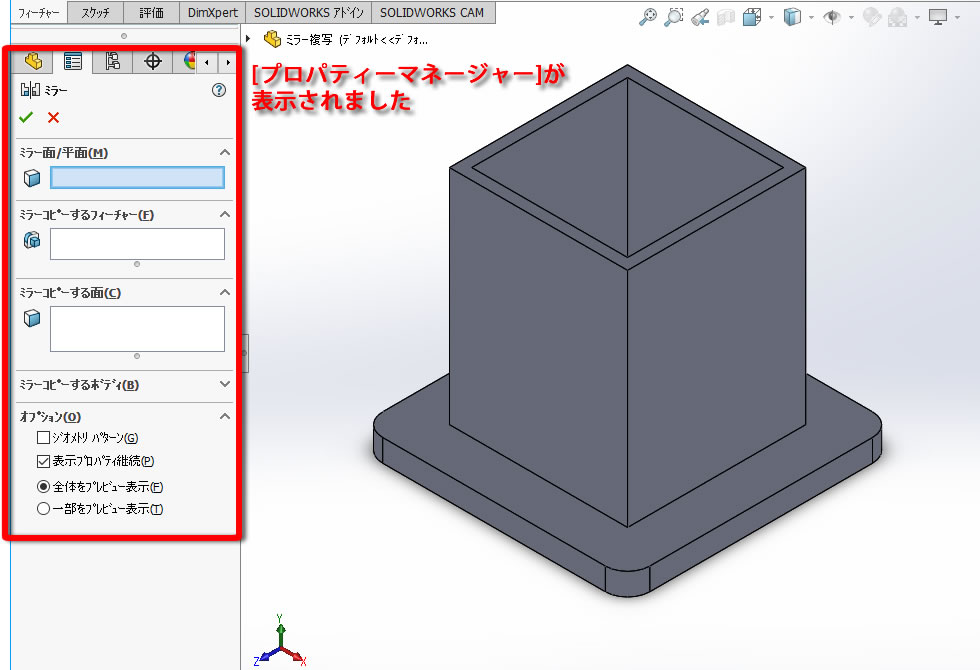
画面左側に[プロパティーマネージャー]が表示されました。
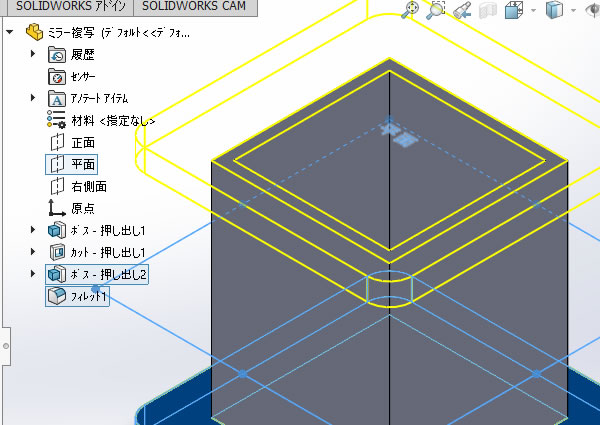
コピーする図形をフィーチャーから選択したいので、グラフィック領域内の左上にある[▷] をクリックして[フライアウトFeautureManagerデザインツリー]を表示させました。
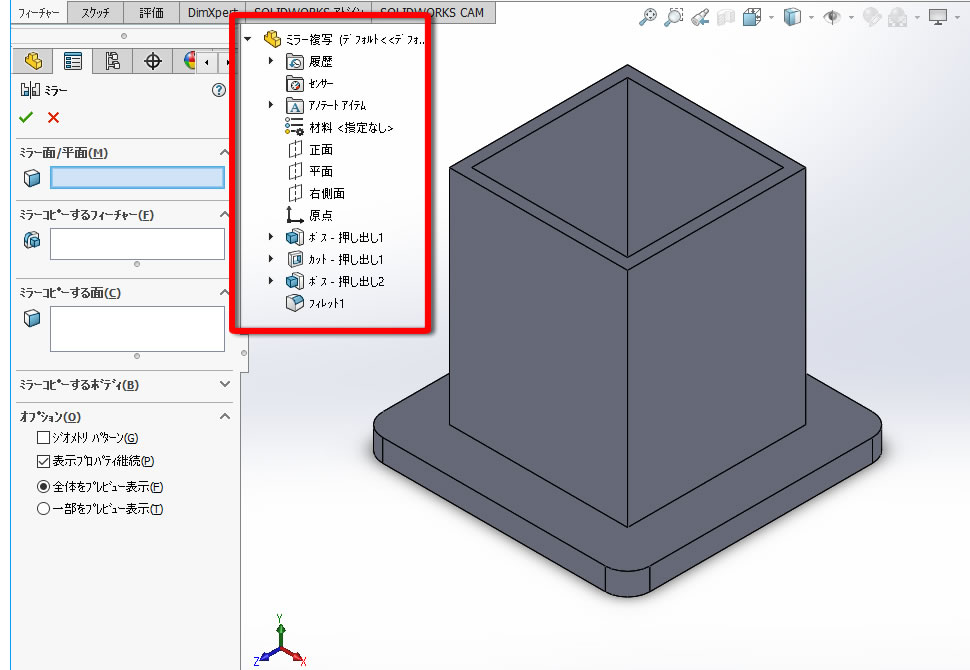
2、面を選択!
対称の中心となる対称平面として[フライアウトFeautureManagerデザインツリー]の[平面]を直接クリックして選択しました。

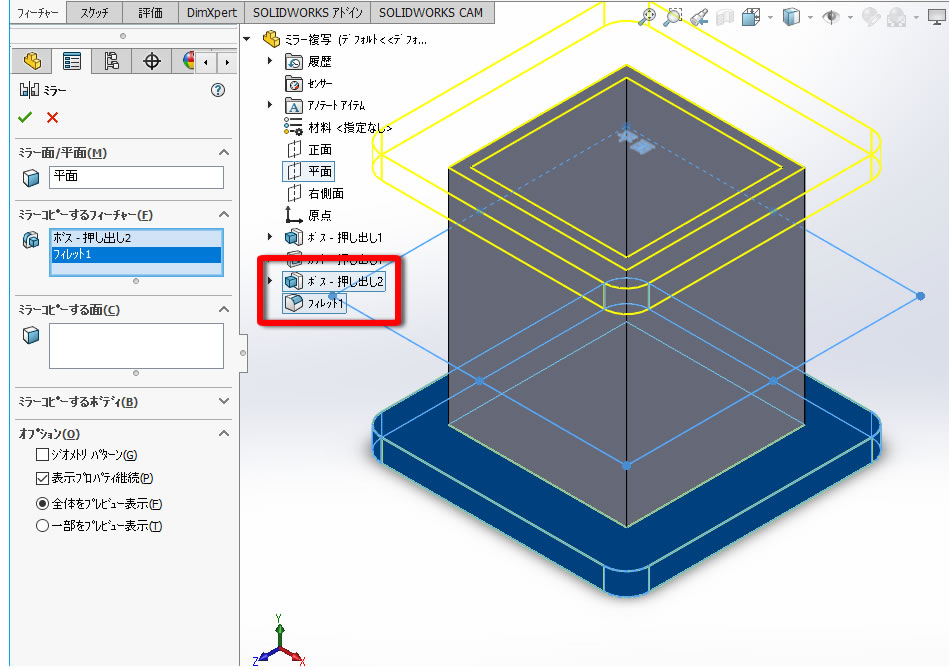
3、コピーするフィーチャーを選択!
複写する要素として[フライアウトFeautureManagerデザインツリー]の[ボス-押出し2]と[フィレット1]を直接クリックして選択しました。
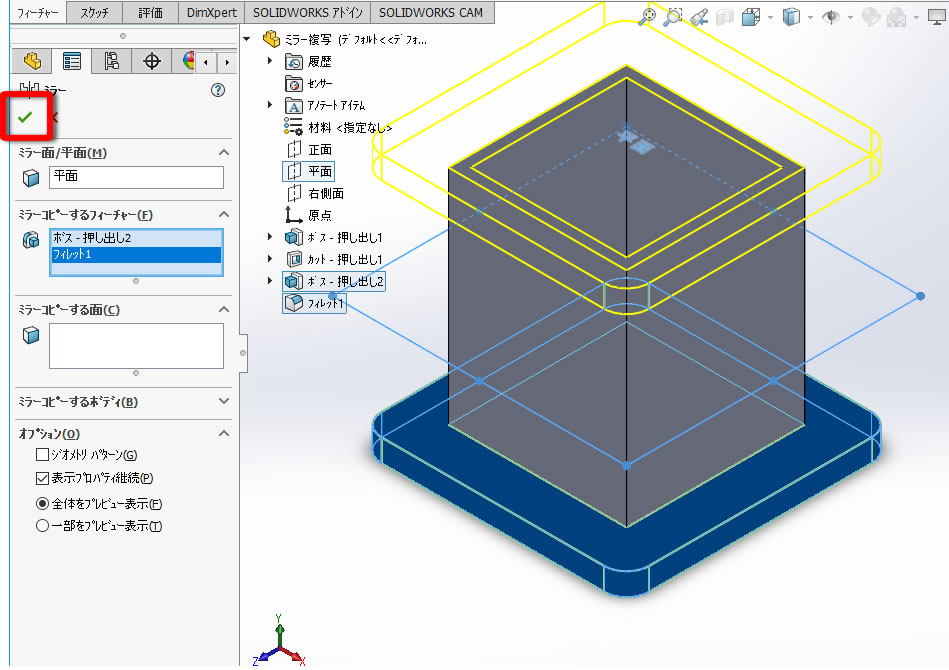
4、ミラーを完成させる!
[OK]でミラーを完成させます。
[OK]入力の方法は、いくつか用意されていますが、今回はプロパティーマネージャー上部にある[ レ ] アイコンをクリックしました。
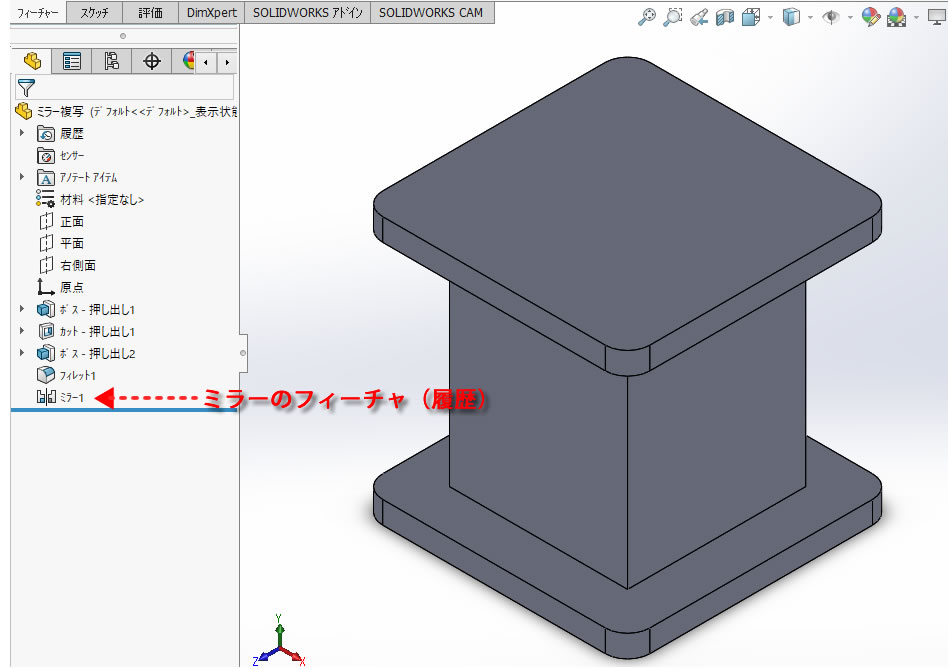
5、ミラー複写ができた!
平面を対称平面にしてミラー複写ができました。
[ミラー]の処理は1つのフィーチャ(履歴)としてデザインツリーに追加されます。
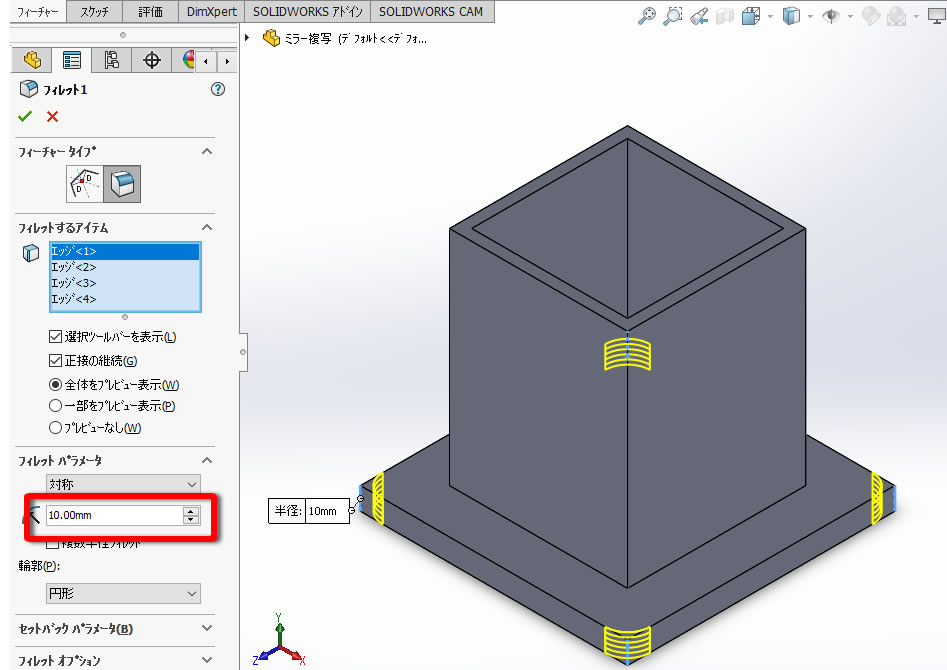
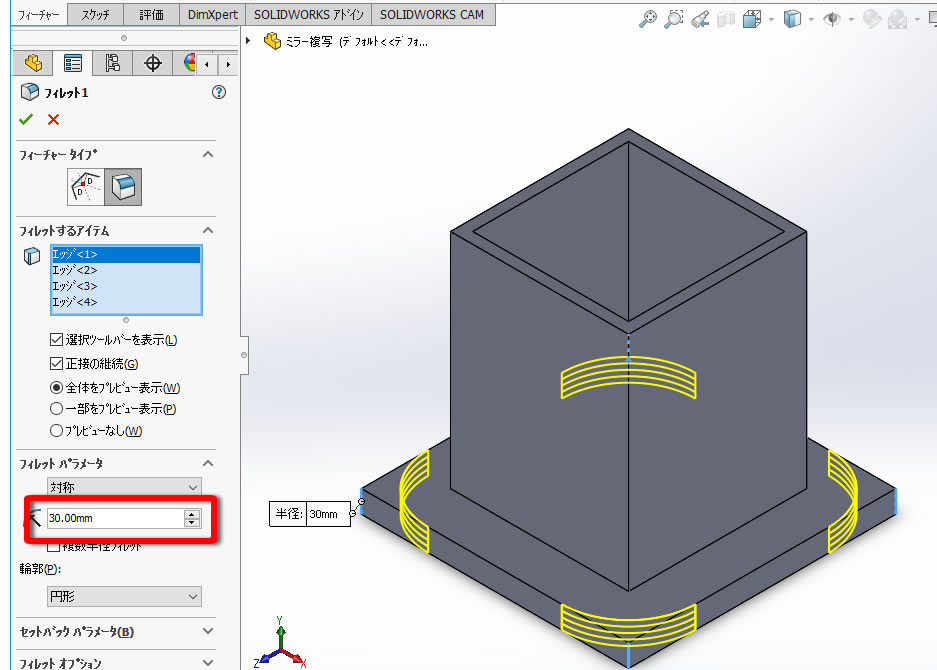
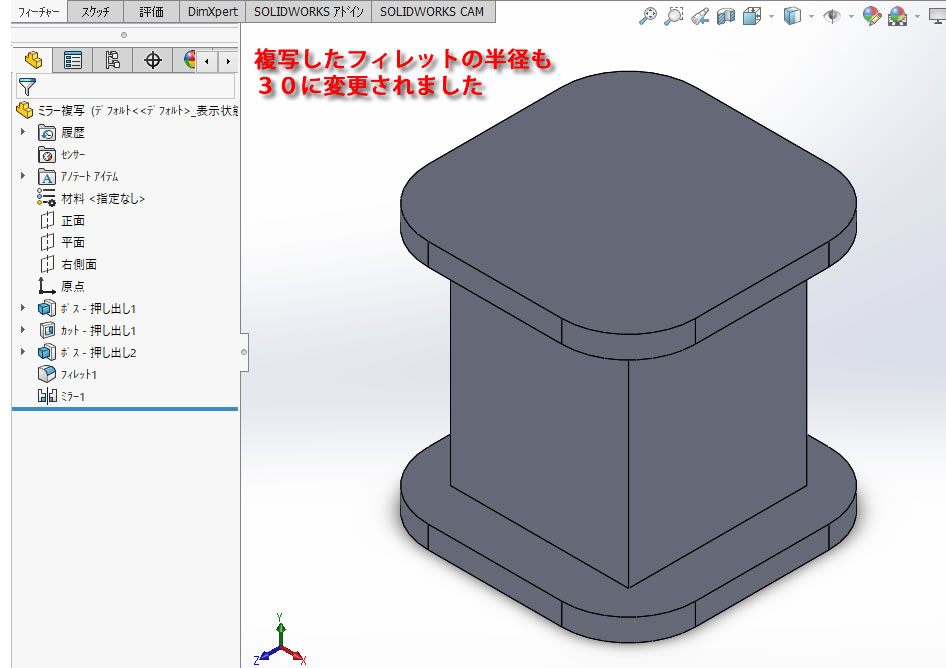
6、フィレットを変更してみた
ミラー複写元のフィレットの半径を[10mm]から[30mm]に変更してみました。
ミラー複写したフィレットの半径も同時に変更されました。
【動画で見てみましょう】
参考記事
Warning: file_get_contents(): https:// wrapper is disabled in the server configuration by allow_url_fopen=0 in /home/ccube/cadcam.ne.jp/public_html/cad100blog/wp-content/themes/cad100blog-2024/functions.php on line 1040
Warning: file_get_contents(https://youtu.be/Fu-gLCkB32w): Failed to open stream: no suitable wrapper could be found in /home/ccube/cadcam.ne.jp/public_html/cad100blog/wp-content/themes/cad100blog-2024/functions.php on line 1040

Warning: file_get_contents(): https:// wrapper is disabled in the server configuration by allow_url_fopen=0 in /home/ccube/cadcam.ne.jp/public_html/cad100blog/wp-content/themes/cad100blog-2024/functions.php on line 1040
Warning: file_get_contents(https://www.cad100.jp/demo/demo-sw_movie.php): Failed to open stream: no suitable wrapper could be found in /home/ccube/cadcam.ne.jp/public_html/cad100blog/wp-content/themes/cad100blog-2024/functions.php on line 1040